Migration Guide: From VMware to VirtualBox
Last Updated: September 4, 2025
Introduction
This article explains the procedure for migrating a virtual machine running in a VMware environment to VirtualBox. Following Broadcom’s acquisition of VMware in November 2023, significant changes to the licensing system have led many companies to consider migrating away from VMware. This guide provides detailed, up-to-date migration steps and troubleshooting advice.
Latest VMware Trends After the Broadcom Acquisition
Key Changes in 2023-2024
Acquisition Details
- November 2023: Broadcom completes its acquisition of VMware for $61 billion (approximately 8 trillion yen)[^1].
- February 4, 2024: End of perpetual license sales, completing the shift to a subscription-based model[^2].
Licensing System Changes
- Discontinuation of Perpetual Licenses: All products have moved to a subscription model (1-year/3-year/5-year).
- Change in Billing Unit: The billing metric has shifted from per-CPU socket to per-CPU core.
- Product Bundling: Over 160 products have been consolidated into the following four editions:
- VMware Cloud Foundation (VCF)
- VMware vSphere Foundation (VVF)
- VMware vSphere Standard (VVS) Sales to end in November 2024
- VMware vSphere Essentials Plus Sales to end in November 2024
Impact on Pricing
- Many companies have reported price increases of 5 to 10 times[^3].
- Renewing support and maintenance for perpetual licenses is no longer possible.
Partner Program Changes
- February 2024: The VMware Partner Program was terminated.
- A shift towards a direct sales model for large customers.
How to Migrate from VMware to VirtualBox
Method 1: Migration via OVF/OVA Export (Recommended)
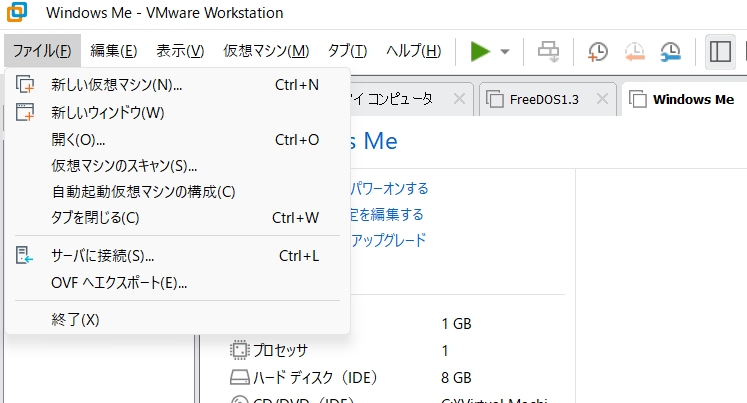
1. Exporting from VMware
Steps for VMware Workstation Pro 17
- Completely shut down the target virtual machine (do not suspend).
- Select the virtual machine in VMware Workstation.
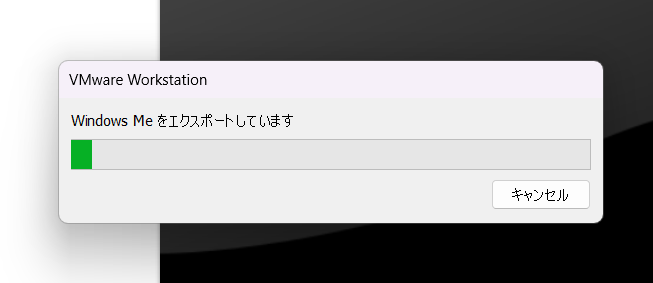
- From the menu, select “File → Export to OVF…“.
- Enter a file name and be sure to change the extension to “ova“.
- Note: The default is .ovf, so you must manually change it to .ova.
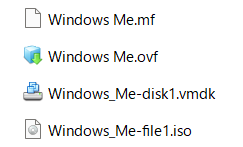
Exported Files (if using OVF format)
.ovf: Virtual machine settings file (XML format)..vmdk: Virtual disk file..mf: Manifest file (contains checksums)..iso: ISO images included if necessary.
2. Importing into VirtualBox
- Launch VirtualBox.
- From the menu, select “File → Import Appliance…“.
- Select the exported .ova or .ovf file.
- Review the settings and adjust as necessary:
- CPU: Adjust the number of cores.
- Memory: Set the RAM size.
- Network: Choose the network adapter type.
- Click “Import“.
Method 2: Using the VMDK File Directly
You can also create a new virtual machine using the VMDK file directly:
- In VirtualBox, click “New“.
- Select the appropriate OS type and version.
- Choose “Use an existing virtual hard disk file“.
- Specify the VMDK file.
- Manually configure other settings (Memory, CPU, Network).
Method 3: Conversion Using OVFTool (Legacy Method)
This method uses the OVFTool included with VMware Workstation (for Windows environments):
cd "C:\Program Files (x86)\VMware\VMware Workstation\OVFTool"
ovftool.exe "C:\VMs\source\vm.vmx" "C:\VMs\export\vm.ovf"
Note: If the path contains spaces, you must enclose it in double quotes.
Troubleshooting
Common Errors and Solutions
1. Network Interface Error
Error Message:
Nonexistent host networking interface, name '' (VERR_INTERNAL_ERROR)
Result Code: E_FAIL (0X80004005)
Solution:
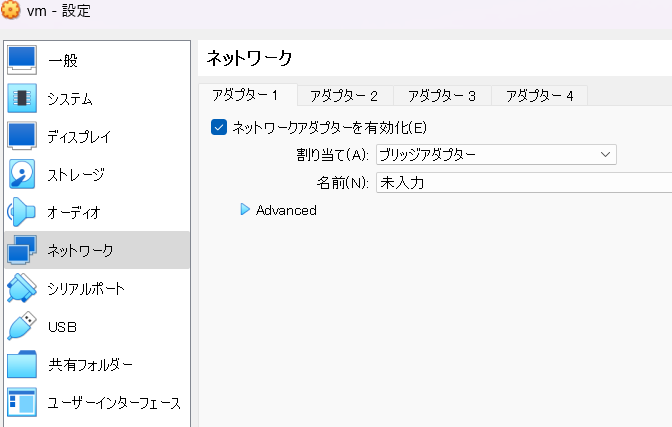
- Open the virtual machine’s settings in VirtualBox.
- Select the “Network” tab.
- Change the “Attached to” setting for the network adapter to “NAT“.
- Original setting: Bridged Adapter (with an empty name field).
- New setting: NAT.

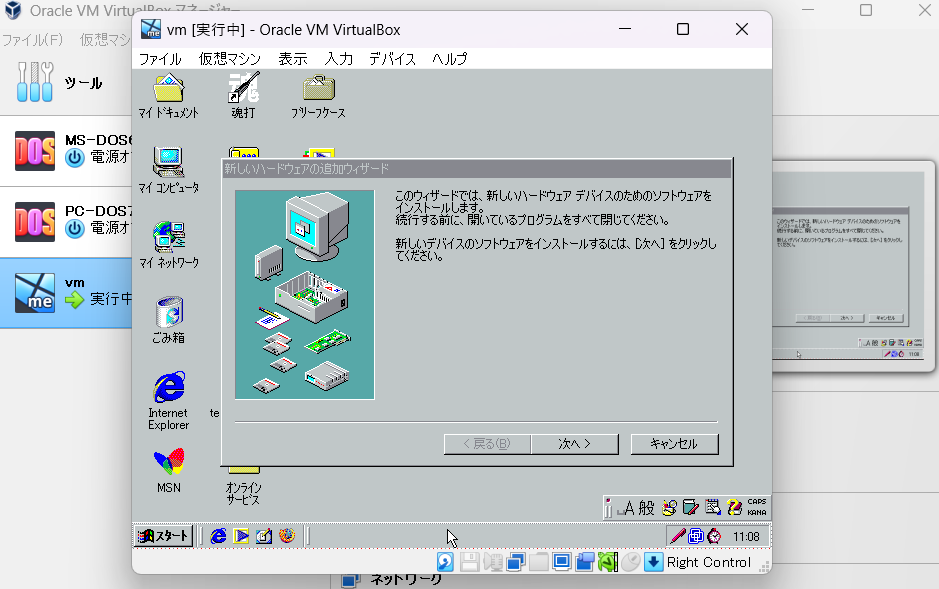
Screen after a successful boot:
2. OVF Specification Incompatibility
Errors can occur during import due to differences in OVF implementations between VirtualBox and VMware.
Solution:
Open the OVF file in a text editor and modify the following line:
<!-- Before modification -->
<vssd:VirtualSystemType>virtualbox-2.2</vssd:VirtualSystemType>

<!-- After modification (adjusted for VMware environment) -->
<vssd:VirtualSystemType>vmx-14</vssd:VirtualSystemType>
3. Hardware Compatibility Issues
If the VM fails to boot, try adjusting the following settings in VirtualBox:
- Check “Enable I/O APIC“.
- Check “Enable PAE/NX“.
- Change the Chipset to “ICH9“.
Post-Migration Optimization
Uninstall VMware Tools
If VMware Tools is installed, it is crucial to uninstall it:
Windows Guest:
- Go to Control Panel → Uninstall a program.
- Select “VMware Tools” and uninstall it.
Linux Guest:
sudo vmware-uninstall-tools.pl
Install VirtualBox Guest Additions
Installing Guest Additions enables the following features:
- Mouse integration
- Automatic screen resolution adjustment
- Shared folders
- Shared clipboard
- Seamless mode
Installation Steps (for Ubuntu/Debian-based systems):
- Install the required packages:
sudo apt update && sudo apt upgrade -y
sudo apt install build-essential linux-headers-$(uname -r) -y
- From the VirtualBox menu, select “Devices” → “Insert Guest Additions CD image…“.
- Mount the CD and run the installer:
cd /media/$USER/VBox_GAs_*
sudo ./VBoxLinuxAdditions.run
- Reboot the system:
sudo reboot
Windows Guest:
- From the VirtualBox menu, select “Devices” → “Insert Guest Additions CD image…“.
- If it doesn’t autorun, open the CD/DVD drive from File Explorer.
- Run
VBoxWindowsAdditions.exe. - After installation is complete, restart the system.
New Information & Updates
Important Updates for 2024-2025
VMware Products Now Free for Personal Use
- VMware Workstation Pro: Became free for personal use in May 2024[^4].
- VMware Fusion Pro: Also free for personal use.
- A commercial license is still required for business use.
New Features in VirtualBox 7.0
- Support for fully encrypted VMs.
- Enhanced support for cloud VMs.
- TPM 2.0 support.
- Secure Boot support.
Alternative Migration Targets
Besides VirtualBox, the following are also being considered as migration targets from VMware:
- Proxmox VE: An open-source virtualization platform.
- XCP-ng: An open-source virtualization platform based on Xen.
- RHEV (Red Hat Enterprise Virtualization): For enterprise use.
- Hyper-V: Included with Windows Server.
Latest on the Broadcom Acquisition (as of September 2025)
- VMware Explore 2024: Declared a “return to private cloud.”
- Employee Reductions: Over 3,000 layoffs have been carried out.
- Impact on the Japanese Market: Significant workforce reductions have also occurred at the Japanese subsidiary, raising concerns about the support system.
Important Notes
Pre-Migration Checklist
- Create Backups: Always create a full backup of your virtual machine before starting the migration process.
- Check Licenses: You may need to reactivate the guest OS license.
- Network Configuration: The MAC address may change, so review your network settings.
- Application Compatibility: Applications that depend on specific hardware may not work.
Known Limitations
- 3D Acceleration: Performance may be inferior compared to VMware.
- USB 3.0 Support: Requires the installation of the Extension Pack (free for personal use).
- Remote Display: VRDP requires the Extension Pack.
End-of-Support Products
Support has ended or is scheduled to end for the following VMware products:
- vSphere Enterprise Plus (Perpetual License version)
- vSphere Standard (Perpetual License version)
- vSphere Essentials/Essentials Plus (Perpetual License version)
- Fujitsu HCI product line (VMware-based)
References
Official Documentation
- VirtualBox User Manual – Oracle Official Manual
- VMware Documentation – VMware Official Documentation (under Broadcom)
- OVF Tool Documentation – Broadcom OVF Tool
Related Articles & Sources
[^1]: Broadcom Completes Acquisition of VMware – Broadcom Official Announcement
[^2]: VMware Subscription Licensing – VMware Licensing Information
[^3]: From various IT media research reports (ITmedia, Nikkei XTECH, etc.)
[^4]: VMware Desktop Hypervisor Free for Personal Use – VMware Official Blog
Disclaimer: The content of this article is based on information available as of September 4, 2025. The specifications of VMware and VirtualBox are subject to change without notice, so please check the latest official documentation when performing the actual work.
Copyright: The screenshots used in this article are for illustrative purposes only. The copyrights for the respective software belong to their respective companies.