How to Import Custom Images to IBM Cloud and Convert VHD to qcow2
Overview
When importing a custom image into IBM Cloud VPC (Virtual Private Cloud), you need an image file in either qcow2 or VHD format. As of 2025, IBM Cloud supports both formats, but you should choose the appropriate one based on your environment and needs.
This article explains how to convert VHD image files, commonly used by VirtualBox and Hyper-V, to the qcow2 format.
Supported Image Formats
IBM Cloud VPC supports the following image formats:
- qcow2 – QEMU Copy On Write 2 format (recommended)
- VHD – Virtual Hard Disk format
Important Notes
- You must upload the image to IBM Cloud Object Storage (COS) before importing it.
- For Windows images, you need to install the virtio-win drivers and Cloudbase-init.
- For Linux images, installing cloud-init is recommended.
- VirtualBox does not natively support the qcow2 format, so a conversion may be necessary.
About the QEMU-IMG Tool
qemu-img is a virtual disk image management tool provided as part of the QEMU (Quick Emulator) project. It is a powerful tool that can convert images between various virtualization platforms.
Supported Formats
qemu-img supports the following formats:
- qcow2 (QEMU)
- vhd/vpc (Microsoft Virtual PC / Hyper-V)
- vmdk (VMware)
- vdi (VirtualBox)
- raw (Raw disk image)
- qed (QEMU Enhanced Disk)
Installing qemu-img on Windows
Method 1: Cloudbase Solutions Version (Easy & Recommended)
The easiest method is to use the optimized binaries provided by Cloudbase Solutions.
- Download
Download the Windows version of qemu-img from the following URL:
https://cloudbase.it/qemu-img-windows/ - Extract
Extract the downloaded ZIP file to a location of your choice.
Method 2: Official QEMU for Windows (Full-featured Version)
If you need more features, you can install the full version of QEMU for Windows.
- Download from the official site
https://qemu.weilnetz.de/w64/
Download the latest installer (e.g., qemu-w64-setup-YYYYMMDD.exe). - Install
Run the downloaded installer and follow the instructions.
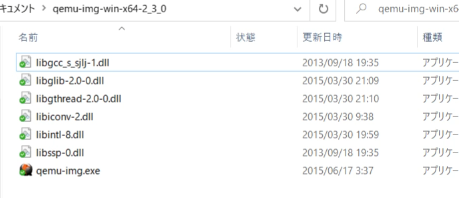
Method 3: Lightweight qemu-img (GitHub Version)
If you prefer a lightweight version, you can get it from this GitHub repository:
https://github.com/fdcastel/qemu-img-windows-x64/releases
Steps to Convert VHD to qcow2
1. Prepare the Command Prompt
Open a Command Prompt and navigate to the folder where qemu-img is located:
cd C:\Users\minok\OneDrive\test\qemu-img-win-x64-2_3_0

2. Run the Conversion Command
If the VHD file you want to convert is in C:\temp, use the following command to convert it:
qemu-img convert -f vpc -O qcow2 c:\temp\win10.vhd c:\temp\image.qcow2
Key Parameter Explanation:
-f vpc: Specifies the input format (use “vpc” for VHD).-O qcow2: Specifies the output format (note the capital ‘O’).- 1st argument: Input file path.
- 2nd argument: Output file path.
Important Note
When dealing with the VHD format, it is crucial to use “vpc” for the format specification, not “vhd”. This is due to the specifications of qemu-img.

3. Verify the Conversion Result
Once the conversion is complete, a qcow2 file will be created in the specified output location:

To check the information of the converted file, use the following command:
qemu-img info c:\temp\image.qcow2
Other Useful Options
Compression Option
You can enable compression when converting to qcow2 format to reduce the file size:
qemu-img convert -f vpc -O qcow2 -c c:\temp\win10.vhd c:\temp\image.qcow2
Progress Bar
When converting large files, you can display the progress:
qemu-img convert -f vpc -O qcow2 -p c:\temp\win10.vhd c:\temp\image.qcow2
Creating a Fixed VHD for Azure
To create a fixed-size VHD for Azure (which automatically aligns to a 1MB boundary):
qemu-img convert -f qcow2 -O vpc -o subformat=fixed input.qcow2 output.vhd
Steps to Import to IBM Cloud
Once the conversion is complete, follow these steps to import the image into IBM Cloud:
- Upload to IBM Cloud Object Storage (COS)
- Create a COS bucket in the IBM Cloud Console.
- Upload the converted qcow2 file.
- Configure IAM Authorization
- Set up access permissions for the VPC to access COS.
- Import the Custom Image
- In the VPC console, go to “Custom images” -> “Create”.
- Select “Cloud Object Storage” as the image source.
- Choose the uploaded file and import it.
Troubleshooting
Common Issues and Solutions
- Conversion Error: “unrecognized format”
- For VHD format, use
-f vpc(not-f vhd).
- For VHD format, use
- Out of Memory Error
- Limit the cache size with the
-moption:
qemu-img convert -m 1G -f vpc -O qcow2 input.vhd output.qcow2 - Limit the cache size with the
- Corrupted Image
- Check the integrity of the image before conversion:
qemu-img check input.vhd
Alternative Tools
Besides qemu-img, you can also use the following tools for image conversion:
- VBoxManage (included with VirtualBox)
- Convert-VHD (PowerShell/Hyper-V)
- StarWind V2V Converter (Free GUI version)
- Packer (Automation tool, has an IBM Packer Plugin)
Summary
Importing a custom image to IBM Cloud VPC is straightforward if you understand the right tools and procedures. qemu-img is a powerful and reliable tool that supports image conversion between various virtualization platforms.
As of 2025, while IBM Cloud supports both VHD and qcow2 formats, it’s important to choose the one that best fits your environment and requirements. It is also recommended to check the necessary drivers and cloud-init/Cloudbase-init settings before importing the image.
Reference Links
- IBM Cloud VPC Custom Image Documentation
- QEMU Official Website
- Cloudbase Solutions qemu-img
- IBM Cloud Object Storage