1. What is Serena?
Serena is a tool that translates instructions in natural language (your everyday conversational language) into commands that can be executed in a terminal.
In short, it’s like setting up a “dedicated AI assistant server” locally that understands your PC’s environment and your project’s status.
This eliminates the need to copy and paste code or explain the project’s background every time you collaborate with AI agents like Claude or GPT. The AI can directly understand the files and code in your local environment through Serena, enabling it to provide more context-aware and accurate support.
2. Advantages of Introducing Serena
By introducing Serena, development and terminal operations become faster, safer, and more intuitive.
| Aspect | Benefit | Description |
|---|---|---|
| 🔒 Privacy | Securely collaborate with AI without sending code externally | Even if company regulations or security policies make it difficult to send code to external services, you can use it with peace of mind as everything is completed within your local environment. |
| 📚 Continuous Knowledge | The AI “remembers” the entire structure of the project | Once you let the AI read a project, it will respond based on its understanding of the relationships between files and the overall picture, dramatically improving the accuracy of the conversation. |
| 💸 Token Savings | Significantly reduce communication costs with the AI | You no longer need to send lengthy code or files to the AI every time, which greatly saves on API usage fees (token consumption). |
| ⚡ Improved Work Efficiency | Intuitively operate commands with natural language | Just by saying things like “run the tests for main.py” or “delete unnecessary Docker images,” it can generate and execute the appropriate commands. |
| 🧠 Improved Response Accuracy | Reduces the AI’s irrelevant answers due to lack of context | Since the AI always has a grasp of the project’s overall picture, it prevents conversations from becoming disjointed due to “insufficient context.” |
3. Installation and Execution Method
Based on the procedure described in the official documentation, here is the organized installation method.
Prerequisites
- Python: 3.11 (Note: 3.12 is experimentally supported but may have LSP compatibility issues)
- uv: A fast Python package management tool
- Git: Used to download the source code
Procedure
Step 1: Install uv
If you haven’t installed uv yet, execute the following command. This assumes a WSL (Ubuntu) environment.
curl -LsSf https://astral.sh/uv/install.sh | sh
For Windows (using winget):
winget install --id astral-sh.uv
Step 2: Run Serena (The easiest way is to use uvx)
Using uvx automates the cloning of the repository and the creation of a virtual environment, allowing you to start Serena directly.
uvx --from git+https://github.com/oraios/serena serena start-mcp-server
Note: The command has changed from serena-mcp-server to serena start-mcp-server as of July 2025.
✅ Summary of the PATH Issue
uv/uvxare installed in~/.local/bin/(Linux/WSL) or%USERPROFILE%\.cargo\bin(Windows)- But when you call
uvxin the shell, it says “command not found” - Cause: That directory is not in your “PATH”
🔧 Solution: Temporarily Apply the PATH (to run it immediately)
For Linux/WSL, copy and paste the following as is and execute it:
export PATH="$HOME/.local/bin:$PATH"
Then, again:
uvx --from git+https://github.com/oraios/serena serena start-mcp-server
💡 This should make uvx recognizable.
📝 Permanent Solution (to make it usable in the next login session)
If you are using bash:
echo 'export PATH="$HOME/.local/bin:$PATH"' >> ~/.bashrc
source ~/.bashrc
If you are using zsh:
echo 'export PATH="$HOME/.local/bin:$PATH"' >> ~/.zshrc
source ~/.zshrc
✅ Final Confirmation:
which uvx
If it outputs the following, you have succeeded:
/home/mamu/.local/bin/uvx
About Permanent Integration of Codex CLI and Serena
Even if you run uvx --from ... serena start-mcp-server once, it’s a temporary server launch that will disappear upon the next login.
The Correct Recipe (Codex CLI / TOML / Latest Version Tracking)
~/.codex/config.toml (or <project>/.codex/config.toml. The project side takes precedence)
Here is an example 👇
# ~/.codex/config.toml
# ※ Please match the filename you are actually editing (the content is unified in TOML)
# --- Project Trust Settings ---
[projects."/home/mamu/serial"]
trust_level = "trusted"

[projects."/home/mamu/rev"]
trust_level = "trusted"

[projects."/home/mamu/codex-cli"]
trust_level = "trusted"

[projects."/home/mamu/wpbk"]
trust_level = "trusted"

# ----- MCP Server Definition (Serena) -----
[mcp_servers.serena]
command = "uvx"
args = [
  "--from", "git+https://github.com/oraios/serena",
  "serena", "start-mcp-server",
  "--context", "codex",
  "--enable-web-dashboard=false"
]
Only add a tag like git+...@v0.1.4 when you want to fix the version.
To run it fixed for a project, add "--project", "/home/mamu/your-project-abs-path" (absolute path) at the end.
Verification Flow (1-2 lines are OK)
- Start
codexat the project root → enter/mcpin the input field- Expected display content
/mcp
🔌 MCP Tools
• Server: serena • Command: uvx –from git+https://github.com/oraios/serena serena start-mcp-server –context codex –enable-web-dashboard=false • Tools: activate_project, check_onboarding_performed, delete_memory, find_file, find_referencing_symbols, find_symbol, get_symbols_overview, insert_after_symbol, insert_before_symbol, list_dir, list_memories, onboarding, read_memory, replace_symbol_body, search_for_pattern, think_about_collected_information, think_about_task_adherence, think_about_whether_you_are_done, write_memory
🎯 If you want to paste the one-liner for everything, here it is
export PATH="$HOME/.local/bin:$PATH"
uvx --from git+https://github.com/oraios/serena serena start-mcp-server
However, as it is now:
🔴 Serena started with
uvx --from ...runs in the foreground
In other words, if you close the terminal, Serena will also stop.
✅ Solution: How to make it reside in the background
You can use one of the following methods to start Serena in the background.
Overview
This explains three ways to run Serena stably in the background using UV. Choose the most suitable method according to your needs.
🚀 Method 1: Use nohup + & (Easy)
Features
- Easiest: Run immediately with a one-line command
- Log Output: Save output to a file
- Terminal Independent: Continues to run even if you close the terminal
How to Run
# Start Serena in the background
nohup uvx --from git+https://github.com/oraios/serena serena start-mcp-server > ~/serena.log 2>&1 &
Operation Check and Log Monitoring
# Check process
ps aux | grep serena

# Monitor logs in real-time
tail -f ~/serena.log

# Check the entire log
cat ~/serena.log
How to Terminate the Process
# Check process ID
ps aux | grep serena

# Terminate the process (replace [PID])
kill [PID]

# Or force terminate
pkill -f serena
Pros and Cons
✅ Pros
- Can be executed immediately without configuration
- Logs are saved automatically
- Simple and easy to understand
❌ Cons
- Manual process management
- No automatic recovery on abnormal termination
🖥️ Method 2: Keep it resident with tmux (Convenient)
Features
- Session Management: Can connect/disconnect at any time
- For Debugging: Check logs in real-time
- Flexibility: Can execute commands as needed
Create and Run a tmux Session
# Create a new tmux session named "serena"
tmux new -s serena

# Start Serena within the session
uvx --from git+https://github.com/oraios/serena serena start-mcp-server
🔌 Important: Detach the Session
Once Serena starts, exit the session with the following key combination:
1. Press Ctrl + b
2. Immediately press d
Result: You will return to the terminal, but Serena will continue running in the background within tmux.
Session Management Commands
# Check session list
tmux list-sessions

# Reconnect to the session
tmux attach -t serena

# Delete the session (also terminates Serena)
tmux kill-session -t serena

# Check all tmux sessions
tmux ls
If using screen (alternative to tmux)
# Create a screen session
screen -S serena

# Start Serena
uvx --from git+https://github.com/oraios/serena serena start-mcp-server

# Detach: Ctrl + A -> D

# Reconnect
screen -r serena
Pros and Cons
✅ Pros
- Can return to the session at any time to check logs
- Easy debugging and troubleshooting
- Can manage multiple servers in different sessions
❌ Cons
- Need to learn basic tmux/screen operations
- Manual restart required after system reboot
⚙️ Method 3: Auto-start with a systemd unit (For production)
Features
- Fully Automated: Starts automatically on system boot
- Fault Recovery: Automatic restart on abnormal termination
- Log Management: Centralized log management with
journalctl - Production Use: Recommended method for server environments
Create a systemd Service File
# Create the service file
sudo nano /etc/systemd/system/serena.service
Service File Content
[Unit]
Description=Serena MCP Server
After=network.target
Wants=network.target

[Service]
Type=simple
User=your_username
Group=your_username
WorkingDirectory=/home/your_username
Environment=PATH=/home/your_username/.local/bin:/usr/local/bin:/usr/bin:/bin
ExecStart=/home/your_username/.local/bin/uvx --from git+https://github.com/oraios/serena serena start-mcp-server
Restart=always
RestartSec=10
StandardOutput=journal
StandardError=journal

[Install]
WantedBy=multi-user.target
Enable and Manage the Service
# Reload systemd to read the new file
sudo systemctl daemon-reload

# Enable the service (set to auto-start)
sudo systemctl enable serena.service

# Start the service
sudo systemctl start serena.service

# Check service status
sudo systemctl status serena.service

# Check logs
sudo journalctl -u serena.service -f

# Stop the service
sudo systemctl stop serena.service

# Disable the service
sudo systemctl disable serena.service
Configuration Notes
- Change
your_usernameto your actual username - Check the path to
uvx(can be found withwhich uvx) - Set permissions appropriately
Pros and Cons
✅ Pros
- Automatic start on system boot
- Automatic restart on abnormal termination
- Standard Linux service management
- Centralized log management
❌ Cons
- Configuration is somewhat complex
- Requires root privileges
🎯 Recommended Method by Use Case
Development/Testing Environment
tmux/screen method (Method 2)
- Easy debugging
- Can be stopped/restarted immediately as needed
Personal Regular Use
nohup method (Method 1)
- Easy configuration
- Sufficient for daily use
Server/Production Environment
systemd method (Method 3)
- Highest stability and reliability
- Includes auto-recovery feature
With the combination of UV and Serena, flexible background execution is possible depending on the use case. It is recommended to first try the nohup method and then migrate to tmux or systemd as needed.
✏️ Personal Recommendation
| If you are… | Recommendation |
|---|---|
| Just want to try it out | ✅ nohup + & |
| Want to use it continuously for development | ✅ tmux |
| Want to run it in production/persistently | ✅ systemd |
(Alternative) If you want to download and run it locally
If you want to manage the source code on your machine, follow these steps:
- Clone the repository
git clone https://github.com/oraios/serena.gitcd serena - Start Serena
uv run serena start-mcp-server
I used tmux, but there are some points to note as below.
1. For Ubuntu
tmuxis not installed by default (even on Ubuntu 25.04).- You need to install it before use:
sudo apt updatesudo apt install tmux - After installation, you can use it right away (no configuration file is needed).
2. For Windows
tmux does not run on Windows natively. You will need to use one of the following methods.
Method A: Use it within WSL (Windows Subsystem for Linux)
- Enter WSL’s Ubuntu, etc., and install it as above:
sudo apt install tmux - The procedure and usage are completely the same as in Linux.
Method B: Use it with Git Bash or MSYS2, etc.
tmuxis often provided as a package in these environments as well.- However, it may not be fully compatible (especially key bindings).
Method C: Use it with Windows Terminal + SSH connection
- Do not install
tmuxon the local Windows, but starttmuxon a remote Linux (VPS or WSL). - In practice, this causes the least trouble.
💡 Practically, it is best for Windows users to run tmux on WSL or a remote Linux. The reasons are:
tmuxitself is a terminal multiplexer for Linux.- On native Windows, it may conflict with the GUI and its behavior can be unstable.
🪟 Windows Version UV Background Startup Guide
Complete Guide to Running UV Commands in the Background
Important Note for Windows
tmux does not work on Windows alone! It is only available on Unix-like operating systems such as Linux and macOS. To use Linux-based tools on Windows, you need WSL or Git Bash.
🚀 PowerShell + Start-Process
The simplest method using Windows’ standard PowerShell.
Start-Process powershell -ArgumentList "-Command", "uvx --from git+https://github.com/oraios/serena serena start-mcp-server" -WindowStyle Hidden
Pros
- Standard Windows feature
- No additional tools required
- Can be executed immediately
Cons
- Difficult to check logs
- Complicated process management
🛠️ WSL + tmux (Recommended)
Utilize Linux tools within the Windows Subsystem for Linux.
# Enter WSL
wsl

# Create tmux session
tmux new -s serena

# Execute UV command
uvx --from git+https://github.com/oraios/serena serena start-mcp-server

# Detach: Ctrl + b -> d
Pros
- Same as Linux environment
- Excellent stability
- High functionality
Cons
- WSL setup required
- Learning curve
⚙️ Task Scheduler
Automatic startup using Windows’ standard Task Scheduler.
Win + R→taskschd.msc- “Create Basic Task”
- Trigger: When the computer starts
- Action: Start a program
- Program:
uvx - Arguments:
--from git+https://github.com/oraios/serena serena start-mcp-server
Pros
- Standard Windows feature
- Supports automatic startup
- GUI setup
Cons
- Complicated setup
- Difficult to debug
🌐 Git Bash + nohup-style
Execute Linux-style commands using Git Bash.
# Execute in Git Bash
uvx --from git+https://github.com/oraios/serena serena start-mcp-server &

# Check process
ps aux | grep serena
Pros
- Linux-style operation
- Lightweight
- Easy to use
Cons
- Limited functionality
- Stability issues
🏆 Best Practices on Windows
Development/Test Environment WSL + tmux is the strongest combination.
Production/Server Environment Stable operation with Task Scheduler + PowerShell.
Quick Test Immediate execution with PowerShell Start-Process.
💡 Pro Tip
It is strongly recommended that Windows developers install WSL. In modern web development, checking operations in a Linux environment is essential. Modern tools like UV also run more stably in a WSL environment.
3. More Advanced Usage
Indexing a Project
To get the most out of Serena on a large project, it is recommended to index the code beforehand (analyze and organize its structure). This further improves the AI’s response speed and accuracy.
# Example: Indexing /path/to/your/project
serena project index /path/to/your/project
Note: The old index-project command is deprecated. Use serena project index instead.
Integration with Client Tools
Serena’s capabilities are maximized when integrated with clients that support MCP (Model Context Protocol), such as Claude Desktop. By specifying the Serena server in the client tool’s settings, the AI can interact directly with your local environment.
For Windows
This command uses the Windows package manager winget to install Astral’s uv.
winget install --id astral-sh.uv
📽 What this command installs
| Item | Content |
|---|---|
uv main executable | ✅ Installed |
uvx | ✅ Automatically included (since v0.1.17) |
| Addition to environment variables | ✅ Usually %USERPROFILE%\.cargo\bin or %LOCALAPPDATA%\Programs\uv is automatically added to the PATH (but depends on PC settings) |
By the way, you might wonder, “I installed uv, but where is serena itself installed?” Actually, uv itself is a Python execution environment manager, and when you call serena, a .serena folder is automatically generated directly under the user directory.
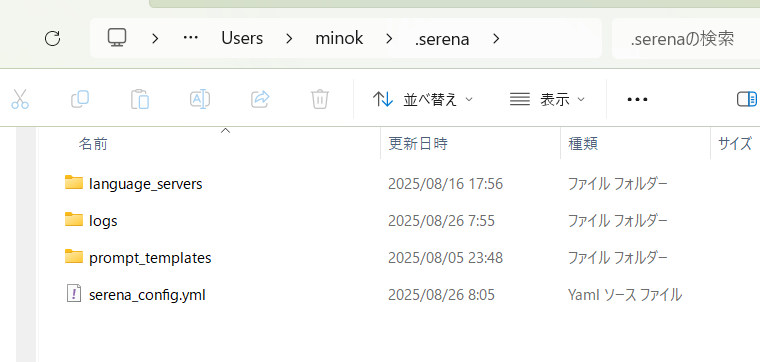
This .serena folder stores the following content:
serena_config.yml… Global configuration filelanguage_servers/… Cache and execution binaries for language serverslogs/… Log filesprompt_templates/(equivalent to contexts/modes) … Definitions for prompts and modes
The specific path on Windows is as follows:
C:\Users\<username>\.serena\
In other words, the mechanism is that “after installing uv with winget install astral-sh.uv, starting serena automatically creates this .serena folder, which becomes the actual storage location.”
About Serena’s Storage Location (A common point of misunderstanding) When you start Serena with uvx (or uv run), a folder named C:\Users\<username>\.serena\ is automatically created on Windows. This is not the installation location for the executable files, but the storage location for global settings and cache (e.g., serena_config.yml, language_servers/, logs/, etc.). Therefore, you do not need to specify .serena as the “execution directory” in Gemini’s settings.json.
On the other hand, the Serena main code is fetched and managed by uvx/uv (direct execution from a GitHub repository, or a temporary environment as a tool). In other words, the point that “.serena = storage for execution modules” is not true is often confused.
Supplement: When to touch .serena
- Changing settings:
C:\Users\<username>\.serena\serena_config.yml - Checking language server cache:
.serena\language_servers\ - Checking logs/clearing cache:
.serena\logs\and others While it is useful as a “storage for settings and data,” it is not the location to specify for the--directoryof the startup command.
4. Recommended for these people
- Developers who handle large codebases
- People who find it troublesome to copy and paste long code to the AI every time
- People who value security and privacy and want to complete their work in a local environment
- People who often feel that “the context is insufficient” in conversations with AI
- People who are thinking of lowering the learning cost of terminal operations
5. Integration with Claude Code
The method for integrating with Serena in Claude Code is described on the official website.
Serena Setup & Usage Guide | Claude | Claude
The following are my notes (from the official site)
Add Serena to the project (execute the following command in the project directory)
claude mcp add serena -- uvx --from git+https://github.com/oraios/serena serena start-mcp-server --context ide-assistant --project $(pwd)
Note: The command format has changed. Use serena start-mcp-server instead of the old serena-mcp-server.
The above command displays the following:
Added stdio MCP server serena with command: uvx --from git+https://github.com/oraios/serena serena start-mcp-server --context ide-assistant --project /home/mamu/codex-cli to local config File modified: /home/mamu/.claude.json [project: /home/mamu/codex-cli]
Loading initial settings
Start a new conversation in Claude Code and say:
Please load Serena's initial settings
Or:
/mcp__serena__initial_instructions
In Serena, you need to explicitly “activate” a project. Please instruct Claude Code as follows:
Specify with an absolute path:
Please activate the project /path/to/my_project
Specify by project name (if previously activated):
Please activate the project my_project
The activated project is automatically added to serena_config.yml, and a .serena/project.yml is generated for each project.
6. Integration with ChatGPT (Important Updates and Corrections)
⚠️ Important: Official ChatGPT Does Not Support MCP Directly
Critical Correction: The official ChatGPT (web version, mobile app, and even the desktop app) from OpenAI does not currently support MCP (Model Context Protocol) directly. OpenAI has announced they are working on MCP support for the ChatGPT desktop app, but it is not yet available as of August 2025.
Current Options for ChatGPT + Serena Integration
Option 1: MCP SuperAssistant Chrome Extension (Third-party)
A Chrome extension called “MCP SuperAssistant” enables MCP functionality in web-based ChatGPT:
- Install the extension: Search for “MCP SuperAssistant” in the Chrome Web Store
- Set up a local proxy server:
npx -y @modelcontextprotocol/inspector - Configure your MCP servers in a config file
- Connect through the extension sidebar in ChatGPT
Note: This is a third-party solution, not officially supported by OpenAI.
Option 2: OpenAI Agents SDK (Developer Solution)
OpenAI has released support for MCP in their Agents SDK (Python):
- Allows connecting MCP servers to OpenAI Agents
- Requires programming knowledge
- Not a GUI solution for regular users
What About “ChatGPT Desktop” References?
The references to “ChatGPT Desktop” supporting MCP in various documents refer to:
- Future plans announced by OpenAI (not yet implemented)
- Third-party clients that may use the name “ChatGPT” unofficially
- Documentation preparing for future MCP support
✅ Verified Working Solutions
| Solution | Status | Notes |
|---|---|---|
| Official ChatGPT Web | ❌ No MCP support | Waiting for OpenAI implementation |
| Official ChatGPT Desktop | ❌ No MCP support yet | Announced but not released |
| MCP SuperAssistant Extension | ✅ Works | Third-party, requires setup |
| OpenAI Agents SDK | ✅ Works | For developers only |
📌 Recommendation
For now, if you want to use Serena with an AI assistant, the most reliable options are:
- Claude Desktop or Claude Code (fully supported)
- Cursor IDE with MCP integration
- VS Code with Cline extension
- Gemini CLI with proper MCP configuration
Future Outlook
OpenAI has publicly stated they are working on MCP support for:
- The OpenAI API
- ChatGPT desktop app
When this becomes available, integration will likely be similar to Claude Desktop’s configuration.